How to Choose a Good Gel Manicure Kit
Having perfect nails is essential for all girls who like to take care of their appearance. There are several big brands that offer complete kits dedicated to nail art fans, so it is natural to wonder how to buy and choose the best gel manicure kit with better value for money.
- The accessories that make up the kit
Nowadays, thanks to gel manicure kits, composed of several accessories, women can enjoy a manicure worthy of a professional: intense color, long-lasting varnish. Where to buy a new gel manicure kit? The answer is to be found in a price comparison tool that can help you find a good gel manicure kit. Indeed, these comparators often contain advice on the use and characteristics of the various accessories that make up a kit.
Inside a gel manicure kit there is always a drying lamp: a UV lamp or an LED lamp. Then there are the accessories needed to complete the manicure. Among these accessories, we find the cleaner, the boxwood stick, the gel varnishes, the base gel varnish, the top coat, the nail file, colored varnishes.
Some gel manicure kits offer little extras such as wipes, nail art decorations or even accessories and a little technology to simplify the realization of the manicure (a peel off gel using which you will avoid the use of products that can be aggressive for the nails, for example). This buying guide for the best gel manicure kits will give you a clearer idea of the accessories that can make up a good kit.
- Time and drying system
Gel varnishes, also called semi-permanent varnishes, have more and more followers. Unlike conventional varnishes, the gel manicure uses a more specific means of drying. Indeed, gel varnishes do not dry in the open air, a special lamp will then be essential.
There are gel manicure kits that have a very practical mini lamp that can be discreetly slipped into a bag. In general, kits consisting of a UV curing lamp are less expensive than those incorporating an LED lamp. The difference between these two types of lamps essentially lies in the drying time of the varnish.
- The price
For women, having pretty nails is a sign of elegance. And the birth of gel nail polish is a real revolution in the world of manicure. However, it is not always easy to choose among the many models, brands and prices of gel manicure kits.
The price is a very important criterion, and this, whatever the product you want to buy. The price of a gel manicure kit varies from brand to brand. It will thus be necessary to find the best kit adapted to its budget. The question that arises is: are the cheap gel manicure kits of good quality?
How to use a Gel Manicure Kit?
Gel manicure kits will allow you to take care of your nails at home and without spending a fortune in a beauty salon. The steps for carrying out a process can be complicated for those new to the field. In order to give you a hand in handling your equipment, we have put together this article. You will find practical advice for the proper use of your equipment.
- Clean your nails
Before starting to use this or that accessory from the kit on your hand, the first step you will need to take is the maintenance of it. Obviously, it is important that you prepare them for future operations to be carried out. Clean your nails and remove traces of the last varnish using a solvent. To have clear contours, use the file.
- Use the polisher and the brush
Once your nails have been cleaned, you will need to use the polisher to have a polished surface and then ensure better adhesion of the gel. The brush will allow you to sweep away the residue and dust resulting from the previous step to have shiny nails.
- Glue false nails
Your manicure kit may include a set of false nails. As for their use, you will have to choose the width that best suits the size of your nails. For their installation, you will have to put them in place using the special glue supplied with your item. We advise you to adjust them at the level of half of the nails. Reuse the polisher, file and brush to give them a natural shine and reduce the demarcation with your nails.
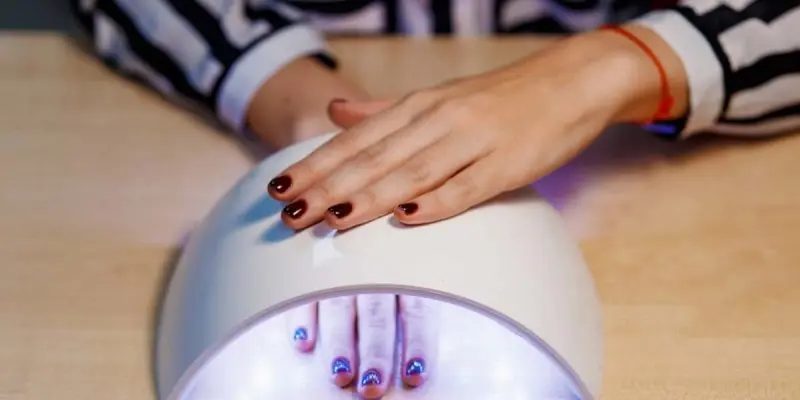
- Preheat the UV lamp and let the gel dry
Unlike standard varnishes, the gel only dries after exposure to UV lights. Your kit will likely include a special lamp dedicated to this purpose. The process is simple, you will have to preheat the device according to the time indicated by the instructions in order to place your hand there.
The gel heats up in seconds and hardens. Please observe the safety instructions and do not introduce non-recommended elements into the lamp, otherwise it may cause bad consequences for your health.
- Take the time to prepare
Take the time to follow the step-by-step instructions during your manicure session. There is no need to rush so as not to end up with unsatisfactory results. If you have a lamp with a timer, activate this feature for much better time management.
- Check lamp performance
It is also important that you check the types of gel compatible with the UV lamp. Be sure to inspect the packaging of your accessory if you need to replace the gels.
- Create nail art designs
At the end of your session, give your nails a special touch with nail art designs. This will allow you to assert your personality. In this case, use glitter or “dotting tools” to create the decorations you want, such as geometric shapes, flowers, stars and many more.
Also Read: How to Choose Good Women’s Watch